CyberPanel utilizes SnappyMail as its default, high-performance webmail client. This guide will show you how to quickly access your inbox and manage your emails.
Try the Live Demo First If you want to explore the interface before logging into your account, you can try the official, secure live demo: https://snappymail.eu/demo/
Method 1: Direct URL Access (Recommended)
You can open your webmail directly through any browser without logging into your primary hosting panel:
- Option A: https://cp.coliserver.com:8090/snappymail
- Option B: https://yourhostingdomain.com
- Option C (If configured): https://mail.yourdomain.com
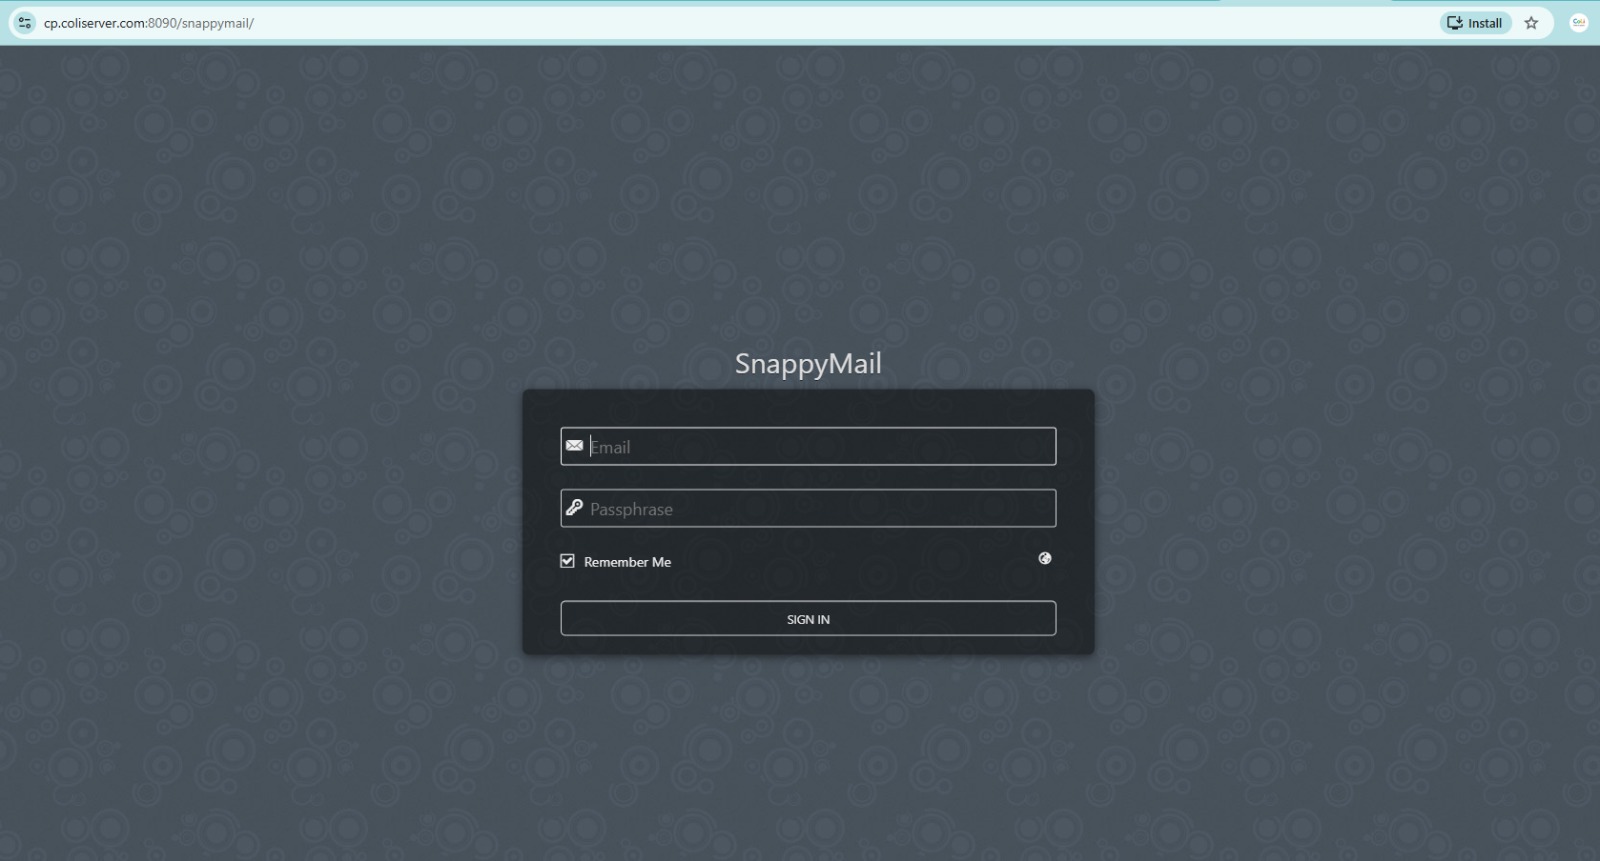
How to Sign In
Once you see the SnappyMail login page, enter your email credentials:
- Email Address: Enter your full email address (e.g., user@yourdomain.com).
- Password: Enter the password you assigned when creating the email account.
First-Time Login: Select System Folders Prompt
When logging into SnappyMail for the very first time, a "Select system folders" modal will appear. You must link each action to its corresponding server directory to ensure your email syncs properly.
Configure the dropdown fields using these standard selections:
* **Sent**: Click the dropdown and select **Sent** (or *Sent Items* / *Sent Messages*).
* **Drafts**: Click the dropdown and select **Drafts**.
* **Spam**: Click the dropdown and select **Junk** (or *Spam* / *Bulk Mail*).
* **Trash**: Click the dropdown and select **Trash** (or *Deleted Items*).
* **Archive**: Click the dropdown and select **Archive** (if available, otherwise you can leave it unmapped or choose a general archive folder).
Click the **Save** button once all fields are mapped to finish your inbox setup.
Customizing Your Email Identity & Display Name
To change the display name or label that your recipients see when you send an email: 1. Click the **Settings (Gear Icon)** in the bottom left corner of SnappyMail. 2. Navigate to **Accounts** > **Identities**. 3. Select your email address (`youremail`) and click **Edit**. 4. Fill in the following fields in the **General** tab: - **Name**: Enter your full name or company name (this is what recipients see in their inbox). - **Label**: Give this profile an internal reference name (e.g., "Main Work Profile"). 5. Click **Save**.
How to Add an HTML Email Signature
You can easily design a rich-text or custom HTML signature that automatically appends to all your outgoing messages.
1. Inside the **Edit Identity** popup window, click on the **Signature** tab (located next to the General tab).
2. Look for the layout option toolbar or formatting controls. To insert structural layouts, tables, or raw code, look for the **three dots icon (...)** or the **`<>` (HTML code view)** button.
3. Toggle the rich-text or HTML visual editor view.
4. **Design your signature:**
- **Visual Editing:** Type out your text and use the toolbar to format fonts, sizes, and colors.
- **Raw HTML Code:** Click the code view (`<>`) to paste custom, pre-made responsive HTML email signature code directly into the container.
5. **Adding Images & Logos:**
- We highly recommend hosting your company logo or profile image online (on your server or an image host) and linking it via its URL.
- Click the **Insert Image** tool and paste the public direct image link.
6. Click the **✓ Save** button at the bottom right of the window to apply your signature.
**Pro-Tip:** Make sure you go to **Settings** > **Composing** in SnappyMail and verify that your compose mode is set to **HTML** so that your graphical signature loads flawlessly every time you create a new email.
How to Set Up PGP Encryption (Crypto Tab)
SnappyMail supports OpenPGP, allowing you to sign or encrypt your emails so only the intended recipient can read them.
Step 1: Access the Crypto Menu
1. From the main screen, go to **Settings (Gear Icon)** > **Accounts** > **Identities**.
2. Click your email address to open the **Edit Identity** modal.
3. Switch to the **Crypto** tab.
Step 2: Choose Your PGP Engine
In the Crypto tab, choose your preferred method to handle encryption keys:
* **Option A: OpenPGP.js (Recommended for Ease of Use)**
- This option runs directly inside your web browser using secure JavaScript.
- Simply paste your existing **Private Key** (used to decrypt incoming mail) and its **Public Key** equivalent into their designated boxes.
* **Option B: Mailvelope Browser Extension**
- If you use the Mailvelope browser extension to manage your keys locally, select this option. SnappyMail will automatically interface with your browser extension keyring.
Step 3: Importing Keys & Saving
1. Locate your PGP key blocks (text starting with `-----BEGIN PGP PUBLIC KEY BLOCK-----` or `-----BEGIN PGP PRIVATE KEY BLOCK-----`).
2. Paste the keys into the matching keyfields under your selected engine.
3. Click **✓ Save** at the bottom right to link the encryption keys to your identity.
Step 4: Sending Encrypted Emails
* Once saved, an **Encryption / Lock icon** will appear in your text formatting toolbar whenever you compose a new email message.
* *Note:* To encrypt a message, you must also import the recipient's **Public Key** into SnappyMail (`Settings` > `Security` / `OpenPGP` menu) so the system can lock the mail specifically for them.
How to Download & Share Your Public PGP Key
Before someone can send you an encrypted email, they need your **Public Key** to lock the message. Your Private Key must always remain secret, but you can safely download and share your Public Key with anyone.
Step 1: Open the Main Security Settings
1. Log into your **SnappyMail** account.
2. Click the **Settings (Gear Icon)** in the bottom left corner.
3. On the settings menu, click the **Security** or **OpenPGP** tab.
Step 2: Export Your Public Key
1. Look for the **Public Keys** section on the screen.
2. Find your email address in the list of keys.
3. Click the **Export** or **Download** icon (often shaped like a tray with a down arrow or an eye icon to view it).
Step 3: Choose How to Share
* **Download as a File:** Save the key as a `.asc` or `.pub` file and attach it to a standard email to your contact.
* **Copy as Text:** If you viewed the key, copy the full text block, including the header and footer lines:
```text
-----BEGIN PGP PUBLIC KEY BLOCK-----
[Your Unique Key Code Rows Go Here]
-----END PGP PUBLIC KEY BLOCK-----
```
* **Share via Email:** Simply paste this entire block of text directly into an email message or add it to your website contact page so people can encrypt messages to you.
How to Import a Contact's Public Key (To Send Encrypted Mail)
To send an encrypted email to someone, your webmail client needs their **Public Key** to lock the message. Once locked, only their matching Private Key can open it.
Step 1: Obtain Your Contact's Public Key
Ask your contact to send you their PGP Public Key. They will usually provide it in one of two formats:
* An **armored text block** starting with `-----BEGIN PGP PUBLIC KEY BLOCK-----`
* A key file ending in `.asc`, `.key`, or `.pub`
Step 2: Import the Key into SnappyMail
1. Log into **SnappyMail** and click the **Settings (Gear Icon)** in the bottom-left corner.
2. Navigate to the **Security** (or **OpenPGP**) section on the left sidebar menu.
3. Look for the **Public Keys** configuration section.
4. Click the **Import** or **Add Key** button.
5. Choose your input method based on what your contact provided:
- **File Upload:** Browse and select the `.asc` or `.pub` file from your device.
- **Text Paste:** Paste the entire text block (including the `BEGIN` and `END` headers) into the text box.
6. Click **Confirm** or **Save**. SnappyMail will read the file and automatically link the key to your contact's email address.
Step 3: Write and Encrypt Your Email
1. Click **Compose** to open a new email window.
2. Enter your contact's email address in the **To** field.
3. Look at your message composing toolbar—the **Lock / Encryption icon** will now become clickable because SnappyMail recognizes that you have a valid matching public key for this recipient.
4. Click the **Lock icon** to turn on encryption, write your message, and click **Send**.
 Copyright © 2026 All Rights Reserved